below I have step-by-step instructions. Let's get started!
Steps:
1. Use a cotton ball and gently remove any nail polish you may have on your nails (I use the Nail Polish Remover non-acetone by Up & Up). Even if you don't have any on, it's good to clean and stregthen your nails.
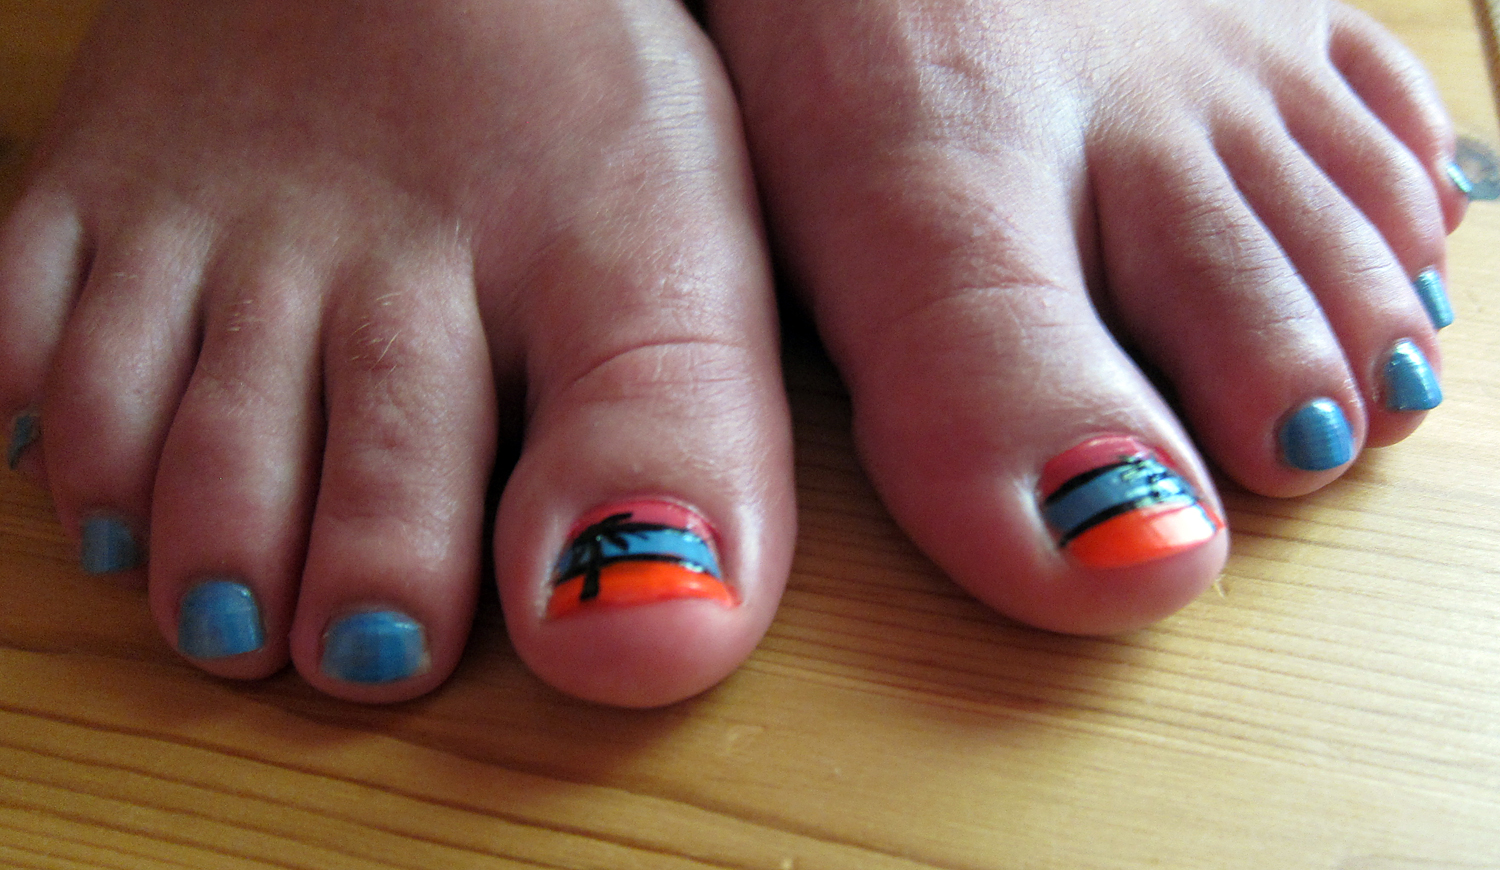
2. Get your first color. I used Milani Nail Lacquer in the color Tropical Fiesta. Apply on a third of your nail.

3. Get your next color ready. I used Essie Nail Lacquer in the color azure. Apply this to the second third of your nail. (Don't worry if you go over the first color because we will be fixing that later!)

4. Get out your final color! I used Color Club Professional Nail Lacquer in the color Lava Lamp. Apply this to the last third of your nail.

5. Now it's time to wait! Let your nails dry a good 5 or so minutes depending on the brand of polish.
6. After letting your nails dry, you can go ahead and get your presicion brush ready. I used Milani Nail Art Presicion brush in the color black.

7. Carefully apply a thin stripe across your nail where the colors are touching.
8. Wait about three minutes and then move on to the palm tree! Use the same precision brush as before and create a line that goes from the bottom the about the first line. then add stems to the palm tree. It's ok if it's a little messy because this is just a silhouette of a palm tree!

9. Now you can decide whether or not to do this on all of your nails or just your thumb or big toe. I chose to paint the rest of my toes in the Essie Azure.
10. Now you can clean up around the nails with Q-tip and nail polish remover. Great job! You have just created a cute nail design that is great for the summer!
xo,
Daphne